One thing people have asked me when they're ready to check out is where I get my tags from. Well, like most things in my store I don't buy them I make them.
Making these tags are really easy and fun too! So what's my secret? Coffee! It's a favorite drink, and a simple tool to make my plain tags into something special.
So here's what you need:
- Plain white tags, I got mine from Office Max
- Coffee, it can be freshly brewed or from the day before.
- Something to soak your tags in, I used a Graniteware pie tin
- Newspaper to put wet tags on
- Ink, stamps, & a make-up sponge *optional
- And most importantly time.
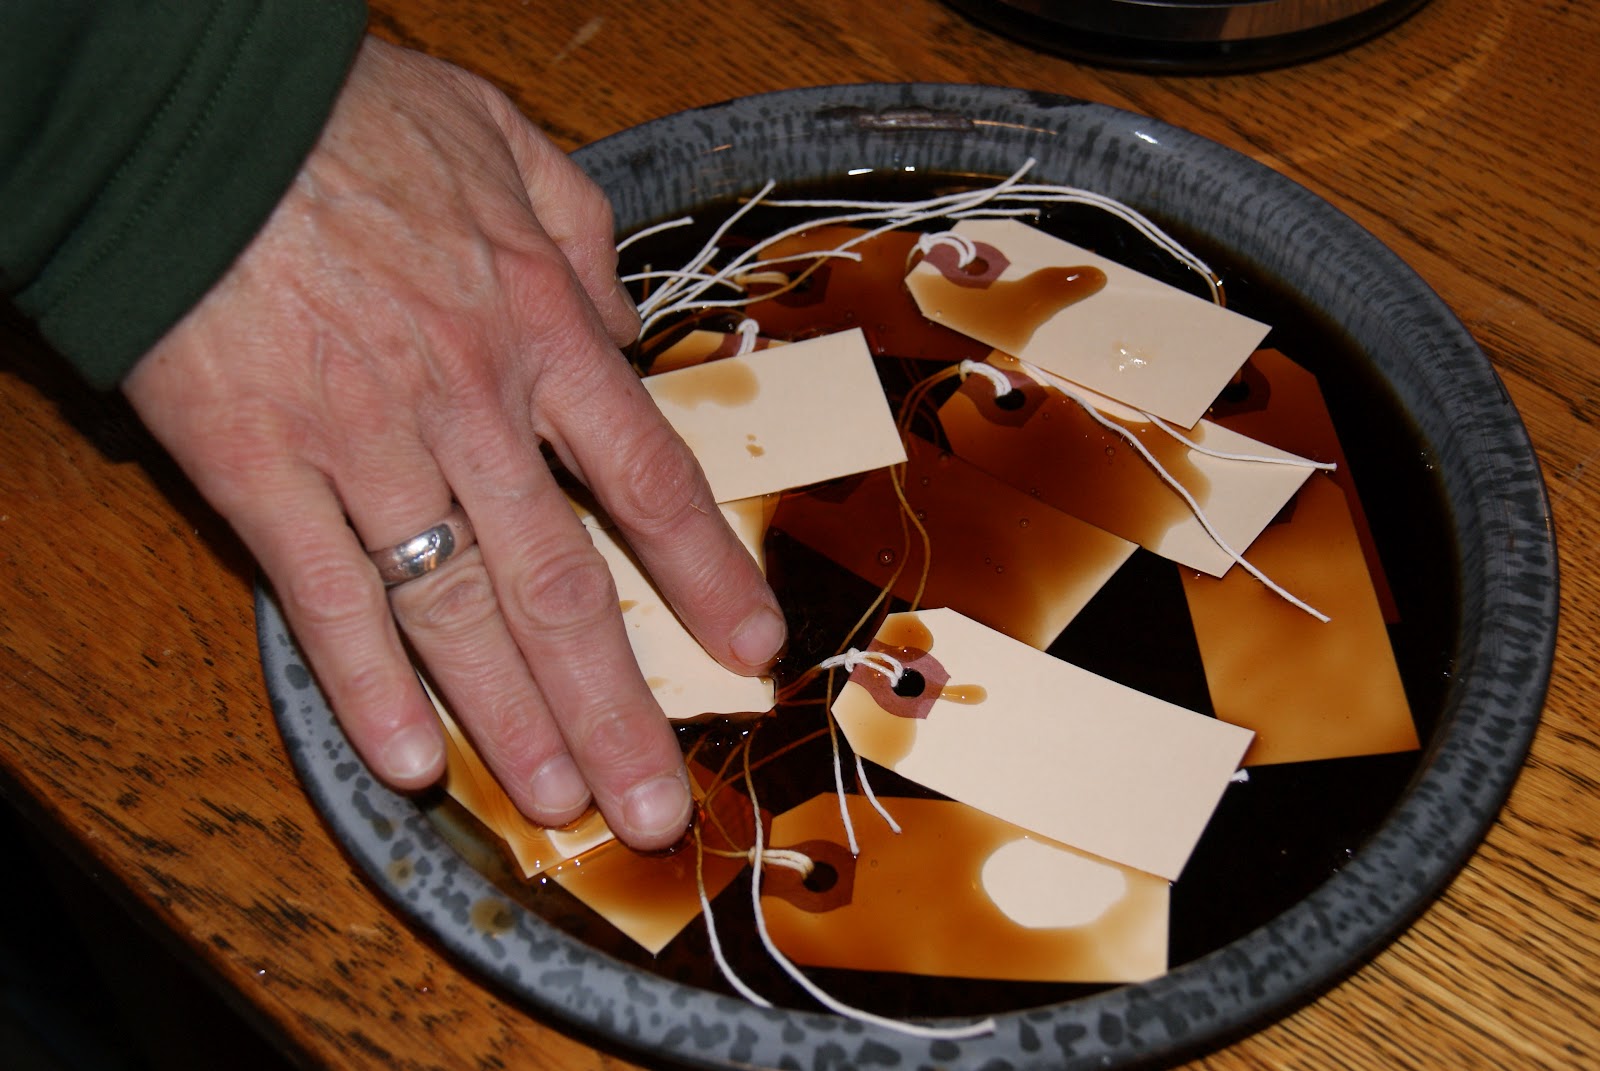
So the first thing you need to do after you make sure you have all your supplies is to pour your coffee into whatever container you've chosen to soak your tags in. Make sure you cover the bottom of your container with coffee.
The next step is to add yours tags to your coffee-filled container.
Worried about how many to add? Don't be! You can add as many tags as you want, as long as you have the room. So add all the tags if you'd like, just make sure you make use of your coffee.
After you've added all your tags press down on your tags, covering them in coffee, if you can't cover them maybe you should add more coffee or take some tags out. If they're not completely covered you won't get the desired look.
Now that all the work has been done you can do the easiest part of this whole project: wait! The waiting can be a little boring but you can always get things done while you're waiting. I recommend waiting at least 4 hours, if not over night. The longer you leave them in the coffee the darker they will get so it's pretty much up to you.
Once you've soaked your tags for the desired amount of time you can remove them from the coffee and set them on your newspaper, and then again wait. I did this project in the store and if you've never been in the store before let me tell you something:
It's cold! With that being said it took a while for the tags to dry. Also, leaving wet tags on wet newspaper doesn't really speed up the process.
I moved the damp tags to a dry piece of newspaper and waited for them to dry.
This is my favorite part of the process, adding the stamps! I used a brown ink to give it that vintage look. I also used a make-up sponge but we'll get to that step later.
Choose from your favorite stamps and just press and
boom! Fun tags
So remember that make-up sponge? Well, I'm going to show you how to give your tags a vintage, worn look. Take your sponge and dab it in your ink.
Take your sponge and lightly dab it on the edges of your tags.
This will be the end result of your tags! These tags are perfect for gifts, reminders, or as I use them for pricing items at the store.


Nice tutorial!!! Could you put the tags between the pages of an old phone book to dry?
ReplyDeleteWe haven't tried it that way but if you decide to use this method please let us know how it turns out!
Delete